
Merge Multiple Video Clips Online
combine multiple videos into one with our free video merger tool.
Ensure you have rights to merge and combine all uploaded video clips.
Merge video clips online free
Upload a video to start Merging
Tools That Pair Well With Video Merging
You have merged your clips — here is what most creators do next to polish the combined video
Video Trimmer
Before merging clips, trim the junk from the beginning and end of each clip first so your final merged video starts and ends clean.
Trim Before MergingShorts Creator
Merged a horizontal video? Convert it to vertical 9:16 format for TikTok, Instagram Reels, and YouTube Shorts.
Convert to VerticalVideo Splitter
Need to break your merged video into smaller chapters or segments instead of one long file? Split it after merging.
Split After MergingInterval Countdown Editor
Add countdown timers or interval markers between clips in your merged video for a professional workout or presentation feel.
Add IntervalsFrame Extractor
Need a thumbnail for your merged YouTube video? Capture the perfect still frame from your combined clip to use as a video cover.
Grab a ThumbnailAudio Extractor
Want just the audio track from your merged video? Extract the combined audio as an MP3 file for podcasts or music sharing.
Extract AudioMulti-Reel Builder
Instead of merging clips end-to-end, stack up to 3 clips side by side in a single 9:16 frame for before/after comparison reels.
Build a ReelVideo merging tool is used for merging personal or properly licensed content only. Please make sure that you have the necessary rights and permissions to upload any videos you use with video merger. Users are responsible for ensuring they have rights to all uploaded media.
How to Merge Multiple Video Clips Online
Follow these simple steps to Merge Multiple Video Clips Online and combine multiple videos into one seamless compilation using ClikDeo
Upload Your Videos
Add multiple videos by clicking the upload button to get started. You can upload MP4, WebM, MOV, and other popular video formats. Add as many videos as you want to combine in a single video.

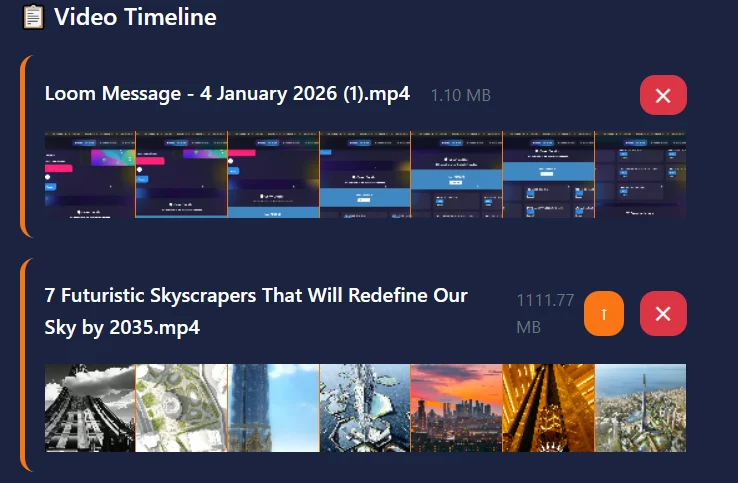
Organize Timeline
View all uploaded videos in the timeline section with thumbnail previews. Use up/down arrows to reorder videos and create the perfect sequence for your merged video. This is how you control the playback order before combining your clips.
Customize Audio Settings
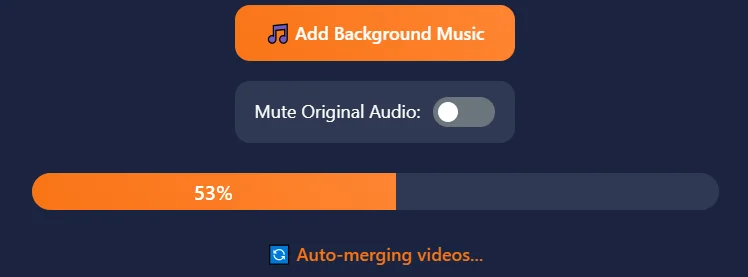
Add background music by clicking 'Add Background Music' button, or mute original audio from videos using the toggle switch. You can keep the original audio or replace it with your preferred background music.
Preview & Navigate
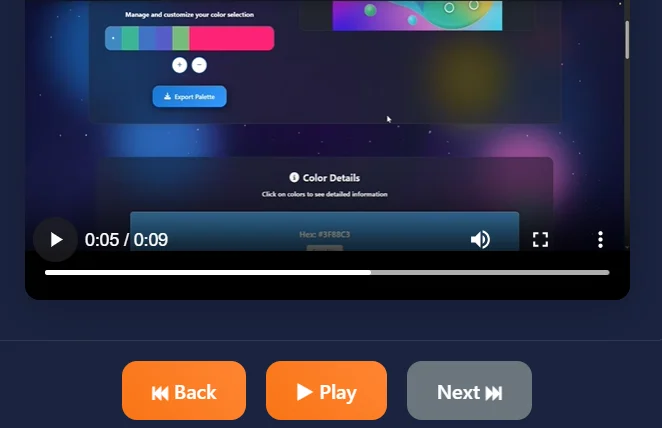
Watch the merged video preview with navigation controls. Use the back and next buttons to jump between different video segments in your compilation to verify transitions.
Export Merged Video
Click download to save your final merged video. The output preserves original quality with smooth transitions between clips and your chosen audio settings — the best free online video joiner without watermark.

Video Merging Tips & Best Practices
Merge all your videos and clips with these professional merging techniques — whether you want to combine videos on iPhone or on desktop.
Optimal Video Order
Arrange videos in logical sequence. You can Organize them by time, by topic, or from simple to complex. Use the timeline controls to easily reorder your selected clips.
Audio Management
Use mute original audio option and try adding background music. For vlogs or tutorials, keep original audio and add subtle background music.
Background Music Selection
Choose different kind of music that matches your content's mood. Loud music for energetic content, soft music for tutorials, and dramatic music for storytelling.
File Format Consistency
For best results, use videos with similar resolutions and same formats. Our tool automatically adjusts, but same format input creates smoother output.
Timeline Organization
You can use thumbnail previews to identify each clip quickly. Use up and downward arrows to reorder videos until the sequence feels natural.
Quality Preservation
Our video merger toolmaintains original quality without any compression loss. Each video retains its resolution and clarity in the final merged file.
How to Merge Videos for Different Platforms — Real-World Workflows
Merging is not a one-size-fits-all process. Every platform, every content type, and every audience expects something different from a combined video. Here is exactly how to merge for each situation.
Merging a YouTube Video: Intro + Main Content + Outro
Most creators use video mergers mainly for this reason. Suppose you have three separate files on your computer: a 10-second channel intro, a 12-minute main video, and a 15-second end screen with a call to action. YouTube does not have a built-in tool to combine these into one upload. So, first of all, you will have to merge them, then upload the single combined file.
The order matters more than you think. Your intro and end screen part should have the same resolution and frame rate as your main video. If your intro is 1080p at 30fps and your main video is 4K at 60fps, the final merged video will force everything to one resolution. This means your intro might look blurry, or your main video will get scaled down. Before merging, use ClikDeo's Video Trimmer to trim each clip to the exact length you want, then merge these trimmed parts here in the correct order: intro first, main content second, outro last.
For the audio: keep original audio on all three clips. Do not add background music over an intro that already has its own audio. If you add background music, the two tracks will clash in the first 10 seconds and sounds unprofessional. If your intro has a branded sound or music sting, it will play naturally before the main video's audio begins.
Wedding Video Compilation: From 20 Raw Clips to One Film
Wedding videographers typically have 15 to 30 raw clips from the entire day. Like ceremony entrance, vows exchange, ring placement, first kiss, speeches, first dance, cake cutting, bouquet toss, and send-off. The client expects one continuous film, not a folder full of fragments. This is where videographers use a video merger to combine all the clips into one polished wedding video.
The workflow is: first, trim every clip using ClikDeo's Video Trimmer to remove the shaky ahaky and blurry starts and abrupt endings. Then merge all the trimmed clips in chronological order using this tool. Finally, add a soft background music track if needed by uploading an instrumental song and enabling "Mute Original Audio" so the music plays cleanly over the entire compilation without overlapping with the original wedding sound.
One important tip for wedding videos: Check every transition point in the preview player. When clip one ends and clip two begins, the audio and video should flow naturally. There should not be a jarring jump or abrupt cut. You can check every single transition in the preview player by using the back and next buttons before exporting the final merged video. If a transition looks harsh, rearrange the clip order or trim the offending clip again to create a smoother entry point.
Combining Multi-Camera Footage for Events and Concerts
If you have recorded a concert or an event from two different camera angles — for example, a wide shot from the back of the room and a close-up from the front — you have two options. There are two different ways to merge multi-camera footage. The professional approach is to switch between the two angles using a dedicated multi-camera editing tool. And the simpler approach is one continuous video that shows both perspectives back to back. If you choose simple approach, merge them: wide shot first, then close-up.
This simpler approach works well for reviewing the full event without switching between files. The thumbnail previews in the timeline are especially useful here because concert or event footage from different cameras and angles often look similar at first glance. Timeline thumbnails help you identify which clip from video is the wide shot and which clip is the close-up. So, you can merge them in correct order before merging.
Merging Clips for TikTok, Instagram Reels, and YouTube Shorts
Video merger is especially useful for social media creators who film multiple short clips throughout the day and want to combine them into one vertical video for TikTok, Instagram Reels, or YouTube Shorts. Social media creators often film a morning coffee shot, an outfit transition, a workout clip, a cooking timelapse — and then merge them together. There is a small difference between merging for social media and merging for YouTube. The difference is the length and pacing of the clips.
Length limit for TikTok and Reels should ideally be between 30 and 90 seconds. Each clip in the merge video should be between 3 and 10 seconds. If you merge clips that are too long, the final video will feel slow and boring. But if the clips are too short, the final merged video will feel rushed and disjointed. Best approach is to merge clips with a consistent length and pacing so the final video feels like a proper story. Also keep original audio enabled on each clip so the natural sounds (coffee pouring, music in the gym, sizzling food) create an authentic, engaging audio track. only use background music if the original audio is distracting or inconsistent across clips.
If your source clips are horizontal (16:9), do not merge them. Instead, first convert each clip to vertical (9:16) using ClikDeo's Shorts Creator, then merge the vertical clips here. Merging first and converting later will result in black bars on the sides or important content being cropped out unevenly across clips.
Merging Recorded Lessons for Online Courses and Tutorials
Teachers and online instructors often record lessons in multiple parts. Because recording a full 45-minute lecture in one take is quite difficult. Instead, they record it into smaller segments like "lesson-part-1.mp4," "lesson-part-2.mp4," and "lesson-part-3.mp4.". But uploading separate files to a student portal or any course platform is confusing for both students and instructors. So, merging them into one complete lecture and then uploading that single lecture file creates a much better learning experience for students.
It is important to keep the original audio enable for merging tutorials and lessons and don't add background music. Students need to hear the instructor voice or get topic message clearly. Including background music with original audio will cause interference and make it hard for students to understand the lesson. The most important thing when merging educational content is the transition between parts. If you merge a part that ends mid-sentence with a part that starts mid-sentence, the final merged video will sound broken. Always trim each part to a clean stopping point using ClikDeo's Video Trimmer before merging.
One workflow that most intructors follow is: record all lesson parts, trim each one to remove dead air and mistakes, then merge the trimmed clean parts in order to get a final polished video. This trim-then-merge workflow produces significantly more professional results than merging raw recordings directly.
Day-in-My-Life Vlog Compilation from Phone Clips
Vloggers often film their entire day routine in short clips on their phone. For example, they might film their morning breakfast, commute footage, work clips, lunch, evening activity. By the end of the day, they have 10 to 20 short clips with different times, locations, and audio. These raw clips are not compelling content on their own. But when these clips merged in the right order with the right audio, they become an engaging vlog with a clear story of the day.
The best order to merge vlog clips is: chronological works most of the time, but with one important adjustment — always put your most visually interesting clip first. Chronological order means the clips are arranged by time of day, starting from earliest to most recent. But if your first clips is boring, viewers will scroll away before they see remaining clips. So, the first clips should be the most visually interesting or you can record a short hook especially for the first 5 to 10 seconds of the vlog. After arranging the clips in the right order, add an upbeat background music track and enable "Mute Original Audio" so the music plays consistently across all clips without sudden volume changes between them.
What To Do After Merging Your Videos
Merging is the middle step in most video workflows. Here are the tools creators most commonly use after combining their clips into one video:
- Your merged video has unwanted parts at the start or end? Use ClikDeo's Video Trimmer to cut the beginning and end of your merged video so it starts and ends exactly where you want.
- Your merged video is too long for TikTok or YouTube Shorts? Use ClikDeo's Video Splitter to divide your merged video into equal-length segments for posting as a multi-part series.
- Need a thumbnail for your merged YouTube video? Use ClikDeo's Frame Extractor to capture the perfect still frame from your merged video to use as a YouTube thumbnail.
- Want to turn your merged horizontal video into a vertical Short or Reel? Use ClikDeo's Shorts Creator to convert your merged clip into a vertical 9:16 format optimized for TikTok, Instagram Reels, and YouTube Shorts.
- Want to extract just the audio from your merged video? Use ClikDeo's Audio Extractor to save the audio track from your merged video as an MP3 file.
Video Merge Privacy
Browser-based video clips merger
When user uploads multiple videos to merge, all processing happens within your web browser. Uploaded clips combined using local processing capabilities and are not stored to server. The merge videos are created using available browser resources.
Local Editing
Video combination and editing with transitions occurs within your browser environment.
Session-Based Handling
Video content is managed and handled within your current browser session during the merging process.
Audio Processing
Background music and Audio combination is performed locally within the browser interface.
Timeline Display
Thumbnail previews and timeline visualization are generated locally from your video files. These visual guides help you organize your clips.
Video Merging Process
Video and audio combination utilizes local browser resources. Merged videos are saved through standard download functionalities.
About Video Merger Tool
What this tool does, where it came from, how to combine videos on iPhone or any device, and how merging actually works behind the scenes
What is a Video Merger?
Video merger is a simple yet highly useful tool for content creators, social media managers, designers, and anyone who works with video content. If you're looking to merge multiple videos online, this tool is perfect for you. Just upload unlimited clips and combine them into one seamless compilation. Suppose you were at an event, your friend recorded event videos in parts and shared videos. You have complete event video but in parts. Just open ClikDeo video merger tool, upload all parts, choose correct positioning and then your video parts start merging into one complete event video. Video merger tool is basically considered as a glue for video files. You might have recorded a presentation in three parts, or your device has multiple short clips from an event, or you are a YouTuber and want to combine a video intro, main content, and an outro into one final video. Instead of opening heavy softwares like Premiere or Final Cut, our tool merges your videos right in your browser, without uploading your videos to any external server. The output will be a single video file that plays from start to end without any visible digital lines between the original clips.
Need to combine multiple videos for a project? Our video merger lets you upload, arrange, and export in any order you want.
History of Video Merging — The Timeline
First digital video editing — In early 1990s, software like Adobe Premiere introduced the concept of combining two or more video clips at a timeline, you have to drag and combine multiple clips at this time in a single final video. But regular people could not afford this because the process needs an expensive hardware, and lots of technical knowledge.
Consumer video editing arrives — To fulfill the increasing demand for merging clips, Windows Movie Maker and iMovie made merging accessible for everyday users in 1999. For the first time in history regular people could drag clips in order and export as one final video. However, the functionality was not stable, quality was often poor and the software crashed frequently.
Online video sharing boom — When YouTube became popular, many people decided to start uploading videos. But to upload videos, they need a video editor without paying for any software. Desktop programs like VirtualDub and Avidemux became popular for merging videos. But the only issues was that, users had to download and install these softwares first.
First browser-based mergers — As web video technology and file handling features improved over time, developers start building video merging tools online. Early versions were slow and limited to only two clips, but with the passage of time, they improved video merging in browsers without uploading to servers.
Modern mergers with audio mixing — This is the time when merging videos online become so reliable that it start feeling like desktop software. Newer video mergers are providing features like background music, thumbnail previews, and audio mixing. ClikDeo video merger tool also have features like "Add background Music" and "Mute Original Audio" etc.
Privacy-focused, local-first merging — As the number of merging tools start increasing and tools became more reliable, People realized that uploading videos to random websites or servers is risky. Modern mergers like this one process everything locally. Your clips never uploaded to any external server, nor leave your computer.
Mechanism — How does video merging actually work?
People assume merging videos is like taping two film reels together. It's not. A proper online video merger has to load clips, calculate duration, render frames, and record the final stream. Here's what happens step by step when you upload clips and click the merge button:
- 1. Loading clips into memory — Whenever a user uploads a video to, the uploaded file is read using the browser's file API. As user can upload or use multiple videos to merge, tool creates temporary URL for each clip so it can be played back without uploading anywhere. All clips will stay in your browser's memory during process.
- 2. Calculating total duration — The tool calculates each clip's duration and then calculates the total duration of the final video. This also helps the tool with progress tracking during the merging process.
- 3. Setting up the canvas — When user uploads a first clip, tool creates a hidden HTML canvas element. The canvas element dimensions match the dimensions of first uploaded clip. If next uploaded clips have different dimensions then tool scale them to adjust according to canvas element dimensions.
- 4. Frame-by-frame rendering — Tool moves from your first clip from start to end on a hidden video element, at about 30 frames per second. Tool draws that frame on to the canvas. This creates a visual stream of the video.
- 5. Audio handling — When tool draws clip frames on to the segment, tool will also extract audio from your original video using Web Audio API. After that Web Audio API connects these audio context with video's audio track. If you have muted original audio of uploaded clips, then those clip tracks will be ignored. And if you have added background music, then that music will also mixed in original video's audio track.
- 6. Recording the merged stream — The MediaRecorder API is responsible for capturing everything drawn on the HTML canvas element along with mixed audio. It saves this separately and then assembles them into a single video blob. As all the processing and merging clips is a real time task, so merging a 10-minute video takes about 10 minute.
- 7. Creating thumbnail previews — Whenever user select a clip, tool generate preview thumbnails for every clip in your timeline. This preview thumbnails have multiple frames from the selected video file. These thumbnails helps you to identify which clip is without play clip.
- 8. Providing navigation controls — In the final merged video, tool tracks the points where each original clip starts and ends. Back and Next button below the merged video player helps you to jump directly to the beginning of each clip, which helps to find each clip in final merged video.
- 9. Downloading the final file — After merging, when you click download button, the tool saves the video blob to your computer as an MP4 or WebM file. The original clips will remain untouched on your computer.
Important notes: All the processing done in your computer. So, merging takes as long as your clips length. For example, if you have three clips, each clip is 2 minutes long and the merged video will be of 6 minutes, merging will take about 6 minutes. If you have an older computer, it might take a bit longer.
Where can you use the merged videos?
Videos merged with this tool are standard MP4 or WebM files, nothing special. So, you can treat these videos like normal videos. You can upload them anywhere you'd normally upload a video. Here are some common platforms listed below, where people uploading these edited videos:
Real-world examples: Suppose a teacher recorded lesson videos separately and needs to share these lessons with students. It's time taking process to share every single lecture one by one. So, teacher can upload all the lessons to "Video Merger", merge all the files into one complete lesson video, and share it in just one go. A content creator combines intro, main content, and outro of a video into one final video and uploaded to YouTube. If you record vlogs on your phone, you can also combine videos on iPhone straight from your camera roll, no desktop needed. The tool doesn't restrict how you use the output, do whatever you want to do with it.
Looking to combine multiple videos into one for your next project? You've found the right tool. Start merging today.
Understanding the merging options
Timeline reordering: Adjust arrangement of your selected videos by pressing up and down arrow next to each clip in the timeline. The first clip at the top in timeline will play first in the merged videos and then next videos. This feature helps you to arrange your story exactly how you want to play.
Background music: You can also upload your own audio file to this tool. The uploaded audio file will play throughout the entire merged video. If the uploaded audio file is shorter than the merged video file then the audio file will automatically loops and start again when finished.
Mute original audio: You can simply add your own voiceover or background music because you can remove all of the video's original sounds.
Navigation controls: After merging, merged video will display inside a preview box. This box has Navigation controls (Back and Next ) buttons. Use these Back and Next buttons to jump at the starting points of every clip. This helps you to check each clip transitions without having to play all the merged video and check manually.
Thumbnail previews: Each selected clip has a thumbnail preview in timeline. This thumbnail preview shows multiple images taken from different points of uploaded clip. Using these thumbnail preview you can check what's inside the clips without playing that clips one by one.
Best Free Online Video Merger 2026
Comparing ClikDeo against other tools built specifically to combine video clips into one — not general editors — based on each provider's own published pages as of September 2026.
- ClikDeo – Best for background music mixing plus a mute-original-audio toggle, with no clip-count limit and no signup.
- Ezgif Video Merger – Best for a simple drag-and-drop reorder interface, though total uploads are capped at 200MB.
- BibiGPT Video Merger – Best for fast local WebAssembly merging, though the free plan caps usage at 1 merge per day.
- CapCut Video Merger – Best for built-in effects and templates alongside merging, though it requires a signed-in account.
- Rotato Merge Tool – Best for a clean, no-signup drag-and-drop merger, though it doesn't offer background music mixing.
| Tool | Free | No Watermark | Local Processing | Background Music | Signup Required |
|---|---|---|---|---|---|
| ClikDeo | Yes | Yes | Yes | Yes | No |
| Ezgif | Yes (200MB cap) | Yes | No | No | No |
| BibiGPT | Yes (1 use/day) | Yes | Yes | No | No |
| CapCut | Yes | Not stated on their site | No | Yes | Yes |
| Rotato | Yes | Yes | Yes | No | No |
Details reflect each provider's own published pages as of September 2026 and may change — always confirm on the provider's own site. Where a policy wasn't clearly stated, it's marked as such rather than assumed.
Frequently Asked Questions
Clear answers to what people actually search for about combining and joining videos online
Click Start Merging and upload your video files, arrange them in the correct order you want, using the up and down arrows in the timeline. Your selected videos will automatically start merging. Click Download Merged Video button to download generated merged videos. You can also add background music or mute the original audio. The merged video downloads as a single seamless file directly to your device.
After uploading your videos, they appear in a timeline list with up and down arrows next to each clip. Use these arrows to rearrange the clips into the exact order you want them to play in final merged video. The first clip at the top of timeline will play first in the final merged video, followed by the next clip below it, and so on.
Click Start Merging and upload your video file. The selected video will appear in the preview box and timeline list. Then click Add Background Music button and upload your audio file from your device. The audio will automatically play throughout the entire merged video. You can easily remove the original video sound by enabling the Mute Original Audio toggle. Once done, click Download Merged Video to save the final file with your combined video and audio to your device.
Yes. Click the Add Background Music button and upload an audio file from your device. The audio will play throughout the entire video. If the uploaded audio file is shorter than total video length, it automatically loops. You can play both the background music and the original video audio, or enable the Mute Original Audio toggle to replace the original audio with your background music. This is useful for adding a soundtrack, voiceover, or ambient music to your compilation.
No. The video merger tool processes your clips without any compression or quality loss. But if your original clips have different resolutions, the tool will try to scale them to maintain a consistent output resolution, and only the clips with lower resolution will cause a slight decrease in quality in the final merged video.
There is no hard limit on the number of videos or clips you can merge together. Users can upload as many clips as their device's available browser memory can handle. Keep in mind one thing that merging time is nearly equal to the total combined duration of all your clips. So, upload files according to your device's performance and combined length of your clips.
The video merger tool accepts nearly all formats including MP4, WebM, MOV, AVI, MKV, FLV, and more. If you upload clips with different formats, the tool will still combine them, but for the most consistent results, it is recommended to use videos with the same format. The final merged video will be saved as MP4 or WebM format.
Click Start Merging and upload all the video clips you want to put together. Selected videos will appear in the timeline list on the left. You can use the up and down arrows next to each clip to arrange them in the exact order you want them to play in the final merged video. Your videos will start merging automatically. Once merging completes, preview the result using the Back and Next navigation buttons to verify every transition, then click Download Merged Video to save the final combined file to your device.
Simply enable the Mute Original Audio toggle to mute all original audio from your uploaded videos. This allows you to add your own background music or voiceover without any interference from the original sound. You can use this feature to use your own music, narration, or sound effects in the merged video.
Merging process takes as long as the total combined duration of all your uploaded clips. This is because the tool processes your videos in real time. For example, if you upload three clips of 2 minutes each, the total length of the merged video will be 6 minutes, and the merging process will take roughly 6 minutes to complete.
The merged video will display inside the preview player once processing completes. Use the Back and Next navigation buttons below the preview player to jump directly to the starting point of each original clip in the merged video. In this way you can check every transition without playing full video manually. If you think any clip order is wrong, you can rearrange the timeline and regenerate.
Open ClikDeo website and visit Video Merger in Safari or Chrome on your iPhone. Click Start Merging and upload your videos from your camera roll. Use the up and down arrows in the timeline to arrange the correct order you want. Your videos will automatically start merging. Once merging completes, click Download Merged Video and the combined file saves directly to your iPhone's downloads folder. No app installation required.
Video merger and Multi-Reel-Builder are totally different tools. The Video Merger joins clips end-to-end. Only one video plays at a time on the visible screen, and videos play one after the other — clip 1 finishes, then clip 2 starts, and so on. The output is a standard video of any length. The Multi-Reel Builder stacks up to 3 clips vertically inside one 9:16 frame. Videos also play one after the other but all the clips visibly stacked inside the 9:16 frame — ideal for before/after comparisons, reaction videos, and social media reels. Use this merger when you want sequential playback, and the Multi-Reel Builder when you want simultaneous playback.
Yes. Our Video Merger tool works on any device smoothly with a modern web browser including iPhones, Android phones, and tablets. Open the page in Chrome, Safari, or Firefox on your device, upload your clips from your device's camera roll or file storage, arrange the timeline order, configure your audio settings, and download the result. The merged file saves directly to your device's downloads folder.
Yes. ClikDeo's Video Merger is completely free in 2026 — no watermark, no signup, and no clip-count limit, unlike some competing mergers that cap free usage to a limited number of uses per day or require an account.