
Best Free Video Splitter Online 2026
Split video online free with 4 different modes — divide by time, file size, or equal parts. No watermark, no sign-up, all processed locally in your browser.
Ensure you have rights to split and edit the videos you upload.
Split MP4 into Parts
Or drag and drop your video here
Supported formats: MP4, WebM, MOV, AVI
Split Mode
Split Configuration
Point in Time
Number of Files
Duration for Each Split
Note: Video splitting will be processed based on your selected mode
Upload a video to start Splitting
Timeline Preview
List of Expected Split Files:
| Part | Start | End | Duration | File Size (Estimated) |
|---|
Download Split Videos
This tool is used for splitting personal or properly licensed content only. Users are responsible for ensuring they have rights to all uploaded media.
How to Split Videos Online – 5 Simple Steps
Follow these simple steps to split video into parts online free with precision using our video splitter tool.
Upload Your Video
Click the upload area or drag and drop your MP4, WebM, MOV, or AVI file. The tool loads your video locally in your browser — nothing is sent to any server.

Choose Split Mode
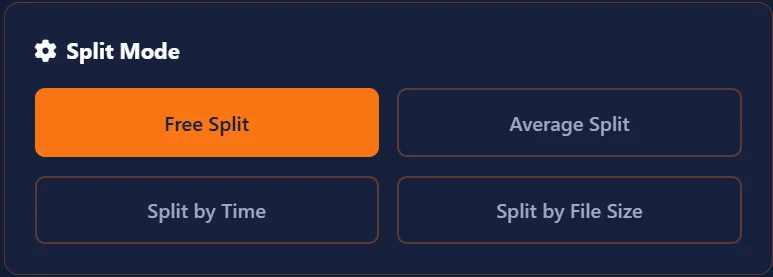
Select from four split modes: Free Split for manual split, Average Split to split video into equal parts, Time Split for specific durations, or Size Split to split video by file size. Prefer a hands-off approach? Auto split your footage instantly using Average Split mode. Choose the mode that fits your needs.
Configure Split Settings
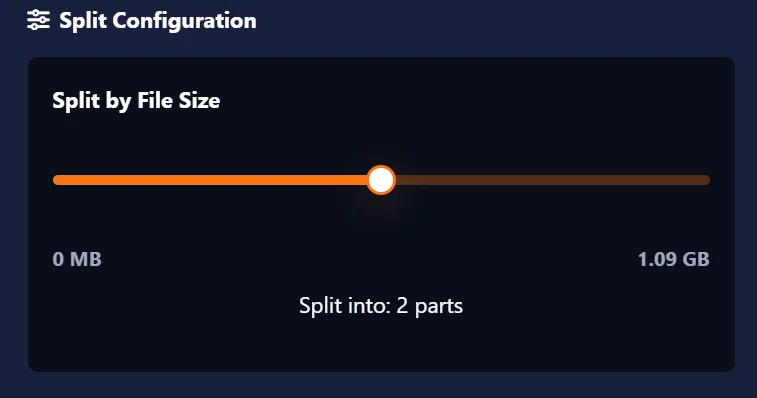
Adjust settings based on your chosen mode: set divider position (Free Split), number of files (Average Split), duration per part (Time Split), or target file size (Size Split). Free Split mode with one divider is perfect for a clean single cut.
Preview Expected Parts
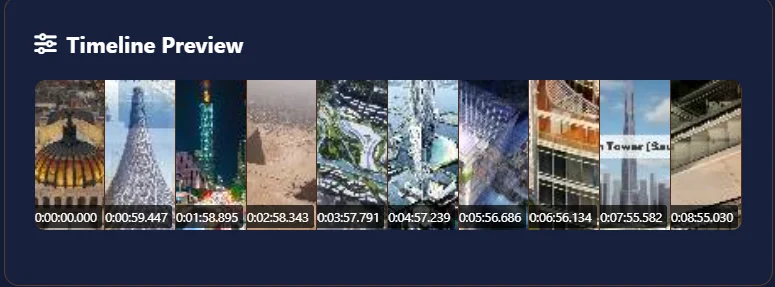
Review your expected split files in the preview table showing start time, end time, duration, and estimated file size for each part. Use the timeline preview to verify your split points before processing.
Split & Download
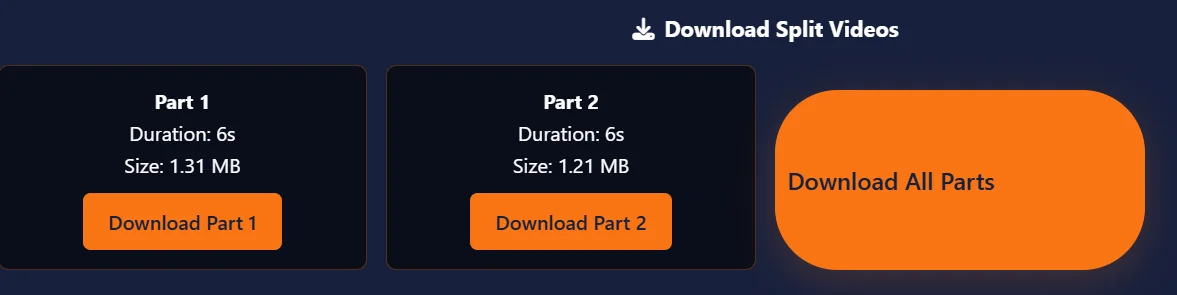
Click 'Split Video' button to process your video. Download all split parts individually or all at once. Each file maintains original quality with your selected timing and file size specifications.
Tools That Pair Well With Video Splitting
You have split your video into parts — here is what most creators do next with those individual segments
Video Trimmer
Split a video but one part still has unwanted footage at the edges? Use the trimmer to clean up the start and end of each split part before sharing.
Trim Split PartsVideo Merger
Split the wrong part of a long video? Merge the remaining good parts back together into one clean file after removing the bad segment.
Merge Good PartsShorts Creator
Split a long video into 60-second parts using Time Split? Convert each part to vertical 9:16 format for TikTok, Instagram Reels, and YouTube Shorts.
Convert to VerticalFrame Extractor
Need a unique thumbnail for each split part? Capture a different still frame from every segment to use as individual video covers.
Grab ThumbnailsAudio Extractor
Split a lecture or podcast into parts? Extract just the audio from any segment as an MP3 file for music sharing or podcast distribution.
Extract AudioInterval Countdown Editor
Split a long workout or training video into parts? Add countdown timers between segments for a professional interval training format.
Add CountdownsMulti-Reel Builder
Split a before/after video into two parts? Stack them side by side in a single 9:16 frame using the Multi-Reel Builder instead of posting separately.
Build a ReelVideo Splitting Tips & Best Practices
Maximize the effectiveness of your video splitting task with these professional techniques
Choosing the Right Split Mode
Use Free Split for precise splits, Average Split for equal parts, Time Split for consistent durations, and Size Split for file size management. Want to auto split without manual adjustments? Average Split handles it in one click.
Accurate Split Points
Find natural scene transitions or pauses in dialogue and break there. To get smoother results, don't split in the middle of important speech or actions. This matters most when you want to divide into two clean, balanced halves.
File Size Considerations
When splitting by size, consider platform file size limits and aim for 100–500 MB per part for easy sharing and uploading across email, messaging apps, and cloud storage.
Duration Planning
Want to share on social media? Keep parts under 2–3 minutes. For tutorials, break at logical topic transitions for better viewer retention.
Preserve Quality
Our splitter maintains original quality without any loss. Even a fast mp4 split retains the video's original resolution and bitrate.
Batch Processing
Use Average Split mode for quick, equal divisions. Perfect for creating consistent-length clips for series or episodes.
Test Before Committing
For long videos, use the preview table to verify each part's start time, end time, and estimated size before clicking Split. Catching a wrong split point here saves you from re-processing the whole video.
When Should You Split a Video? Real-World Scenarios by Platform
Splitting is not just about making files smaller. Every platform, every content type, and every audience has different rules. Here is exactly when and why you should split your videos.
Turning a Long YouTube Video into YouTube Shorts
A most common use case for splitting is to take a long-form video and create multiple clips from it for YouTube and other social platforms. Suppose you have a 15-minute tutorial or a 30-minute long recording and want to extract a series of 60-second clips from it to post as YouTube shorts. Videos under 60 seconds get 5 to 10 times more reach than regular videos on YouTube. So, splitting your long video into multiple clips is a smart strategy to increase your channel engagement and reach.
The smoothest workflow is to upload your long video, select one of the split modes (Free, Average, Time, or Size), and set the duration to 60 seconds, and press "Split Video." The tool will automatically generate as many 60-second clips as possible from your uploaded video. After splitting, you can download each clip individually or all at once in a zip file. Then use ClikDeo's Shorts Creator to convert each horizontal (16:9) clip into vertical (9:16) format before uploading these clips as YouTube Shorts.
One important detail: do not split every video blindly into 60-second clips. If your video has natural breaks at 1:15, 2:30, and 3:45, splitting your video at those natural breaks will produce more accurate and smooth clips. Use Free Split mode to split at those exact timestamps instead, so each clip gives you one complete topic or tell a complete story. A best way to create a series of small stories from a long video.
Splitting Videos for Email, WhatsApp, and Telegram
Every email service or messaging platform has its own file size limits. Gmail allows 25MB for every email attachment. WhatsApp allows up to 16MB for every video attachment but for WhatsApp Web, attachment limit is up to 64MB. Telegram allows up to 2GB for every video attachment but because of network speed and data usage, its difficult for some users to share files larger than 500MB. But when your video limit exceeds these limits, you need to split your videos into smaller parts to share them.
When you share your video in multiple parts after splitting, recipients don't need any special software to play these parts. They can simply click on each part and watch it because all split parts are in standard MP4 format.
Splitting Long Lectures and Course Recordings into Lessons
Teachers and professors record 45 to 90 minutes lectures for their online courses on daily basis. But students often find it difficult to watch a 90 minute lecture in one go and if a student wants to watch a specific topic in that lecture, they have to watch the whole lecture to find thats specific point. So, splitting long long lectures or recordings into smaller lessons is a best way to make it easier for students to watch and learn. Research shows that of video exceeding 10 minutes, completion rate drops 40%. The solution is to split long recordings into shorter, topic-based segments.
If your lecture or course recording has natural chapter breaks at equal intervals, use Average Split mode. Using Average split mode, you can split a 60-minute lecture into equal 6 parts of 10 minutes each segment. If your lecture has different topics with different durations, use Time split mode to set the duration like 10 minutes each part. This will split your lecture into multiple parts of 10 minutes each. If your video has exact timestamps, use Free Split to split at those precise points.
Before splitting, consider ClikDeo's Video Trimmer to remove dead air, mistakes, and "um-filled" pauses from the full recording first. Workflow like trimming first and then splitting will produce a more polished final results for your students.
Creating a Multi-Part Series for TikTok, Reels, and IGTV
TikTok allow users to upload videos up to 10 minutes long, but if you want to maximize reach and engagement, shorter clips are better. TikTok's algorithm favors content under 3 minutes. Instagram Reels have a maximum length of 90 seconds, and IGTV allows you to upload videos up to 60 minutes long. If you have a 12-minute long vlog or a 20-minute tutorial, posting these videos as one long clip on these platforms will give you less reach and engagement. Best strategy is to split these videos into a multi-part series like "Part 1", "Part 2", "Part 3" and so on and upload one part at a time.
To get best clips for TikTok, use Time Split with 150 seconds (2.5 minutes) per part. This will give you maximum allowed length for tiktok videos while keeping each part under the 3-minute range. For Instagram Reels, use 90 seconds per part. The key point to get successful on these platforms is, no matter what the length of your clip, each clips should tell a complete story or deliver a complete message. Each part should start with a brief recap of the previous part (3 seconds), deliver the main content, and end with a hook for the next part.
If your source video is horizontal, before posting on tikTok or Instagram, convert each split part to vertical (9:16) using ClikDeo's Shorts Creator. This ensures your content fills the entire mobile screen instead of showing black bars on the sides.
Splitting Gaming Sessions and Screen Recordings
Gamers, streamers, and screen recorders who use OBS or other recording software often end up with long recordings that are 1 to 3 hours long. These recordings or videos mostly have unusual breaks and pauses in between matches or topics. A single gaming session might include 5 to 10 separate matches or rounds, each worth sharing as an indivitual video. A screen recording tutorial might cover 8 different topics that should each be a standalone video. Uploading these as one massive video will give you less reach and engagement.
If you have a gaming video with multiple matches, play that video and note the timestamps of each match. After recording, use Free Split to split at those exact timestamps. This will give you individual clips for each match, which you can post one by one as series. If all of your matches in a single recording have same length then use Average Split — just set the number of parts to match your number of matches and let the tool handle the math.
You can use Time Split to split a long screen recording into equal parts of 5, 10, or 15 minutes each. But if your recording is larger in size than 2GB, use Size Split and split your recording into manageable parts of 100MB to 500MB each. This will make it easier to share and upload on social media platforms.
Splitting Podcasts and Audio-Heavy Recordings by Topic
Podcasts are a growing medium for content creators, and many podcasters record long episodes that are 30 to 60 minutes long. Some users consume the full episode, but many listeners prefer to listen shorter highlight clips from the full episode. These highlight clips are usually 2 to 5 minutes long and deliver main message or point of the complete episode. The smart strategy is to split your long podcast video into multiple 2 to 5 minute short clips and distribute them on social media platforms like Instagram, TikTok, and YouTube Shorts to drive traffic to your full episode.
Splitting a podcast episode is different from splitting your regular video. Because the audio of every episode is as important as the video. You have to listen through the episode and note the timestamps of the most compelling moments like a surprising fact, a controversial opinion, an engaging story, or a valuable tip. Then use Free Split to extract each of those moments as an individual clip. To get more engagement and reach, try to keep each clip between 90 seconds and 3 minutes long.
After splitting, you can also use ClikDeo's Audio Extractor to save the audio track from any split segment as an MP3 file for distribution on podcast platforms like Spotify and Apple Podcasts.
What To Do After Splitting Your Video
Splitting is usually the first step in a larger workflow. Here are the tools creators most commonly use after dividing their video into parts:
- Your split part has unwanted footage at the start or end? Use ClikDeo's Video Trimmer to clean up the edges of each split segment before sharing.
- Want to recombine the good parts after removing a bad segment? Use ClikDeo's Video Merger to merge the remaining good parts back into one video.
- Split a long video into 60-second parts for Shorts? Use ClikDeo's Shorts Creator to convert each horizontal split part into a vertical 9:16 format.
- Need a thumbnail for each split part? Use ClikDeo's Frame Extractor to capture a unique still frame from every segment.
- Split a podcast recording into highlight clips? Use ClikDeo's Audio Extractor to save the audio from any segment as an MP3 for podcast platforms.
About the Video Splitter
What this tool does, where it came from, and how it actually works under the hood
What is a Video Splitter?
A video splitter is a tool that helps you to split video into equal parts based on your requirements. Suppose you have a two-hour lecture recording, A 3-hour long movie, an event video, a forty-minute tutorial, or a long vlog that's too big to share easily. Whenever you want to divide media into smaller, shareable pieces, this is exactly the tool for the job. Our splitting tool allows you to break long videos into shorter segments. You can split by specific time intervals (e.g., every 10 minutes), by file size (e.g., every 100MB), by selecting number of files (e.g., No of Files: 5) or manually at any point in the video. Just select your preference mode, and hit "Split Video". The tool processes the video according to your settings and gives you downloadable parts. No upload to any server, no watermarks, no hidden fees.
Understanding the Four Split Modes
Free Split — Want to split mp4 file at one exact point? Use Free Split mode. When you select a video, the video timeline will display below the video with a slider on it. Drag the slider over the timeline left or right to choose exactly where to split. The tool will divide into two parts instantly — one before the slider, one after. Best for splitting a video from exact center or at a natural point.
Average Split — Use Average Split mode to split video into equal parts. Just select the video and tell tool how many parts you want. Press "-" or "+" buttons to choose number of files you want. Tool divides the total video duration equally and create that many number of files you selected. This mode is perfect for splitting a long video or recording into equal length parts or series.
Time Split — Mode to create exact time clips. This mode is useful for platforms that have time limits on uploaded videos (e.g., Instagram reels under 90 seconds) or you want to split a long video into equal parts having equal time. You set a fixed duration (like 5 minutes, 10 minutes, or 30 seconds). Tool will create as many parts as needed, and each part will have exact time length decided by you.
Size Split — Use this mode to split video by file size. Drag a slider to choose file size for every part (e.g., 50MB, 100MB, 500MB). The tool will calculate automatically that how many parts will create in that file size, and then start splitting. This mode is perfect for creating videos for email attachments, upload limits, or if you need to split your long video under a specific file size.
Mechanism — How Does Video Splitting Actually Work?
People think that splitting videos is like cutting a slice of an apple. Here's a complete step-by-step guide about what happens when you click "Split Video":
- 1. Video decoding in memory — When user uploads a video file to splitter tool, Browser accesses these files without uploading them to any external servers. File API reads the selected video file in browser's memory.
- 2. Calculating split points — After uploading video file to browser, user has to choose splitting mode (free, average, time, or size). After selecting mode, tool calculates exact timestamps from video where each new part should begin and end. For example, for free split, there will be only one timestamp. For average split, timestamps depends on chosen number of parts. For time split, tool creates parts duration based on your selected time. For size split, tool estimates duration based on file size ratio.
- 3. Creating a hidden video element — To create clips from a long video, tool creates a temporary video to load original video.
- 4. Canvas capture and audio mixing — To divide long videos into smaller parts, a canvas captures video frames at about 30 frames per second. In the same time, Web Audio API extract audio track from the uploaded video. In the final step both, audio track and canvas combined in a single MediaStream.
- 5. Recording the segment — Recording the segment happens real time, this is the main reason splitting a 10-minutes long video might take about 10 minutes. The MediaRecorder API records the combined stream into a video blob.
- 6. Creating download links — As MediaRecorder API records the segments and each recorded segment becomes a downloadable video file MP4 format. You can save created smaller parts individually or all at once.
Important: Splitting long videos or creating smaller parts from long video is a local process. Your CPU does all the processing work. So, this is the main reason that splitting videos is a time consuming task, as 15-minutes long video might take 15 minutes to divide.
History of Video Splitting — The Timeline
First consumer video editing — In 1989 a software like Avid and in 1991 Adobe premiere introduced some basic splitting tools. These tool were not enough advanced, too expensive, and need some technical knowledge to use these tools. Regular people can't use these at home or at normal computers.
Desktop video editing arrives — In 1999 Windows Movie Maker and IMovie introduced basic splitting functionalities for everyday users. You could split or divide videos into multiple parts but this was still time-consuming process.
Online video boom — YouTube launched in 2005, and after its popularity, people started uploading everything to YouTube. In early days, file size limits on free accounts (100MB, then later 1GB) forced users and creators to split their videos in smaller sizes. This increased the demand of splitting tools rapidly. Fast, reliable mp4 split tools became essential for creators managing upload limits.
First browser-based splitters — As HTML5 and JavaScript became more advanced, developers created tools for splitting long videos into small clips without uploading them on any server. The early versions were slow and buggy, but the positive thing was that whole processing done inside a local browser.
Modern splitters emerge — In the year 2018 to 2020 developers created online splitters became more practical with faster JavaScript engines. Even modern tools like ClikDeo auto split offer splitting videos with four modes: Average split, time split, size split and by default free split.
Local-first, privacy-focused tools — When tools became modern, people started thinking about their privacy and risk of losing data. Because when users selected a video, the selected videos were uploaded to servers and after processing videos or content remain there. In short, people realized that uploading videos to random websites or servers is risky. Today splitters process videos locally. Your videos never leave your computer.
Where Can You Use the Split Videos?
Once you have split or created smaller parts from your long video. These smaller parts or clips are standard video segments. So you are free to use them anywhere like:
Real-world examples: A teacher can use this tool to split their 3-hour long lecture into 10-minute segments to easily share with students. A content creator creates a full length video and then create smaller parts to remove raw scenes or parts from final video. A gaming institute can break training course into smaller parts and can share each part to a different student.
Content creators often use Time Split mode with a 60-second duration to create short-form clips from a long video — a simple way to produce YouTube Shorts in bulk without any manual trimming.
Video Splitter Processing
Local browser-based video splitting functionality
Our tool processes and splits your videos within your web browser. Uploaded videos are processed locally and are not uploaded to servers for storage. Video parts are split using local browser processing capabilities, so you can divide your video without ever uploading a file.
Browser Processing
All four split modes including free, average, time-based, and size-based are processed in your browser using WebAssembly technology.
Local File Handling
Video files are processed and split within your browser environment during active editing sessions.
Session Processing
Videos are loaded into browser memory temporarily for the current splitting session.
How Video Splitting Works
Video splitting process occurs within your browser's processing environment using available resources. After splitting, parts are available for download through standard browser download mechanisms.
Video Processing Approach
Video splitting functionality utilizes local browser resources for processing. Content is handled within the browser environment during active editing operations.
Best Free Video Splitter Online 2026
Comparing ClikDeo against other tools built specifically to split videos into parts — not general editors — based on each provider's own published pages as of September 2026.
- ClikDeo – Best for 4 split modes, local browser processing, no watermark, and no signup.
- FlexClip Video Splitter – Best for a simple drag-to-split interface, though free uploads are capped at 30 minutes.
- Adobe Express Video Splitter – Best for combining splits with Adobe's stock library, though it requires a free Adobe account.
- Cloudinary Video Splitter – Best for developers needing a splitting API, though single-file processing happens on Cloudinary's servers, not locally.
- Clipchamp Split Tool – Best for Microsoft 365 users, though it requires a Microsoft account to sign in.
- DigitalCoding Video Splitter – Best for instant stream-copy splitting with no re-encoding, and like ClikDeo, runs entirely locally with no signup.
- Kapwing Video Splitter – Best for team collaboration features, though free exports are watermarked.
- 123apps Video Splitter – Best for a long-established, no-frills interface, though files are processed on their servers rather than locally.
| Tool | Free | No Watermark | Local Processing | Signup Required |
|---|---|---|---|---|
| ClikDeo | Yes | Yes | Yes | No |
| FlexClip | Yes | Yes | No | No |
| Adobe Express | Yes | Yes | No | Yes |
| Cloudinary | Yes | Yes | No | No (basic tool) |
| Clipchamp | Yes | Yes | No | Yes |
| DigitalCoding | Yes | Yes | Yes | No |
| Kapwing | Yes | No | No | Yes (to export) |
| 123apps | Yes | Yes | No | No |
Details reflect each provider's own published pages as of September 2026 and may change — always confirm on the provider's own site. Note: DigitalCoding's Video Splitter uses the same local, no-signup, no-watermark approach as ClikDeo — it is the closest direct match in this comparison.
Frequently Asked Questions
Straightforward answers to what people actually search for about splitting videos online
Click Start Splitting, upload your MP4 file, choose one of the four split modes (Free, Average, Time, or Size), configure your settings, and click Split Video. The tool processes everything locally in your browser. Download all new parts individually or at once.
Upload your video and use the Free Split mode designed exactly for splitting a video into two parts with precise control. When you upload your video, a timeline appears with a draggable marker. Move the marker to the exact point where you want to split your video. Tool will create two parts: One from the start to the marker, and the other from marker to the end.
You need to use the Average split mode to divide a video into equal parts automatically. Upload your video, select Average Split mode, then use the "+" or "-" buttons to choose how many equal parts you want. The tool calculates the total duration and divides it equally into the number of parts you selected. For example, if you choose 6 parts for a 30-minute video, each part will be exactly 5 minutes long. This is the easiest way to auto split a long video into equal parts.
Use Size Split mode. After uploading, switch to "Split by File size" and then drag the file size slider to your target size per part — for example, 25MB for Gmail attachments or 100MB for WhatsApp. Tool will automatically calculate how many parts will be created at your selected size and shows you the expected number of files before processing. When you need to send a video through platforms with strict file size limits like email, Telegram, or messaging apps, this mode is perfect.
You can use Time Split mode to split a long video into clips of the same length. After uploading your video, select "Split by Time" and then set the desired duration for each clip. For example, 60 seconds for YouTube Shorts, 90 seconds for Instagram Reels, or 10 minutes for tutorial segments. Tool will create as many clips as needed based on your selected time duration. This mode is ideal for creating consistent length clips for social media, tutorials, or any situation where you want each part with same duration.
Free Split — drag a single marker left or right to manually choose one split point, producing exactly two files. Best for precise single-point splitting. Average Split — choose a number of files and the tool divides the video into that many equal-duration parts. Best for series or episodes. Time Split — set a fixed duration per clip and the tool creates as many clips as needed. Best for social media batches or timed segments. Size Split — drag a slider to set maximum file size per part. Best for email attachments and upload-limit workarounds.
Yes. There is a List of Expected Split Files table appears before you click Split Video button, showing each part's start time, end time, duration, and estimated file size. For Free Split mode, the timeline bar shows exactly where your marker sits on the video. This table updates in real time as you adjust settings.
No. Each split part maintains the original video quality — the same resolution, bitrate, and frame rate as your source file. The tool does not re-encode or compress the video.
This is because the splitting process happens in real time within your browser using your computer's CPU. The tool reads each video frame, draws it on a canvas, mixes the audio track using Web Audio API, and records everything in real time using MediaRecorder. So, if you split a 15-minute video, it will take about 15 minutes to process.
The video splitter accepts MP4, WebM, MOV, and AVI formats for upload. Split parts download as standard MP4 or WebM files. Both are universally compatible and play on all devices, platforms, and editing software without conversion.
This depends on your content structure. If your lecture has chapters of equal length, use Average Split — set the number of parts to match your chapter count and each gets equal time. If your chapters don't have same length, use Time Split. If you want to split at exact natural breakpoints like topic changes or pauses, use Free Split for each individual split point — process one cut at a time and use the resulting parts for subsequent cuts if needed.
Yes. ClikDeo's Video Splitter is completely free in 2026 — no watermark, no signup, and no file count limits, unlike several competing splitters that cap free exports, require an account, or add a watermark until you upgrade.